
|
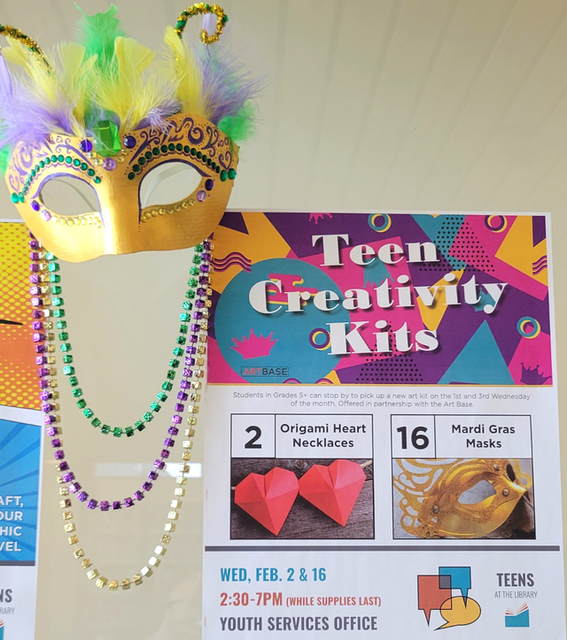
Mardi Gras has been celebrated in New Orleans for hundreds of years. During Mardi Gras, masked performers participate in carnivals, parades, and dances. These masks add an element of mystery and intrigue to any Mardi Gras costume. Create your own mask with the supplies included in this kit!
Instructions: Step 1: Begin by painting the mask with either a solid color, or a pattern. A common design used on masks is a diamond pattern, like a checkerboard. The glitter glue can be used to add decorative dots or lines to the mask. Step 2: Next, attach the gems to the mask with the glitter glue. Step 3: Glue the feathers to the top of the mask, and attach the pipe cleaners and ribbons as additional decoration Step 4: Celebrate by wearing your new Mardi Gras mask and necklaces! Take pictures and email to info@theartbase.org or Kristen Doyle, kdoyle@basaltlibrary.org Máscara de carnavalEl Carnaval de Mardi Gras se celebra en Nueva Orleans desde hace cientos de años. Durante el Mardi Gras, los artistas enmascarados participan en carnavales, desfiles y bailes. Estas máscaras añaden un elemento de misterio e intriga a cualquier disfraz en Mardi Gras. ¡Crea tu propia máscara con los materiales incluidos en este kit!
Materiales suministrados • Máscara en blanco • Pintura • Pinceles • Pegamento con escarcha • Collar de cuentas • Gemas o joyas • Limpiadores • Cintas Instrucciones: Paso 1: Comienza pintando la máscara con un color sólido o con un patrón. Un diseño común utilizado en las máscaras es un patrón de diamantes, como un tablero de ajedrez. El pegamento con escarcha se puede utilizar para añadir puntos o líneas decorativas a la máscara. Paso 2: A continuación, pega las gemas a la máscara con el pegamento con escarcha. Paso 3: Pega las plumas en la parte superior de la máscara y coloca los limpiadores y las cintas como decoración adicional. Paso 4: ¡Celebra usando tu nueva máscara de carnaval y tus collares! Toma fotos y envíalas por correo electrónico a info@theartbase.org o a Kristen Doyle, kdoyle@basaltlibrary.org
0 Comments
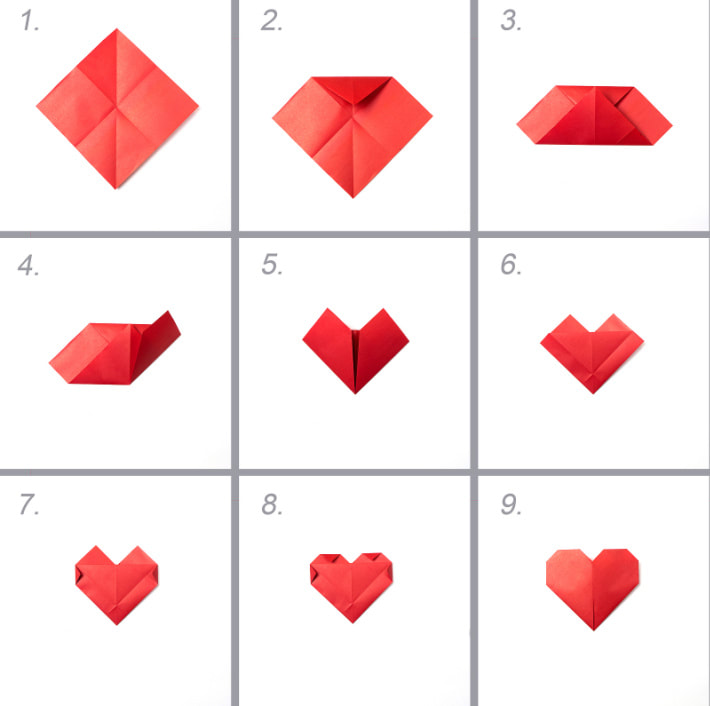
Origami, which means “folded paper,” is the Japanese art of creating complex shapes and forms by simply folding a square sheet of paper. This kit provides instructions and supplies to make a traditional heart shape, as well as a heart pendant, which can be worn on a necklace. 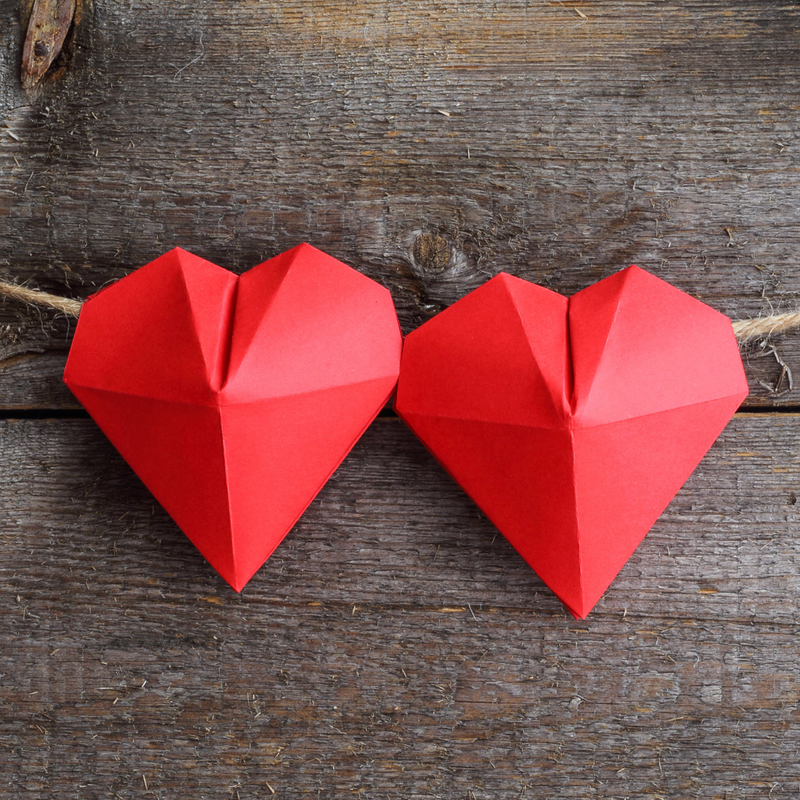
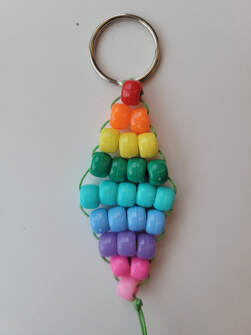
Take pictures and email to info@theartbase.org or Kristen Doyle, kdoyle@basaltlibrary.org. Llaveros con cuentas de Poni
Toma fotos y envíalas por correo electrónico a info@theartbase.org o a Kristen Doyle, kdoyle@basaltlibrary.org . January 5th: Chinese New Year Lanterns
It’s the year of the Tiger! Have fun decorating your very own lantern to celebrate the new year. The 2022 Chinese New Year begins in February 1, 2022 and lasts for 15 days. This holiday is based on the lunar calendar and this changes each year. During this time, traditional dragon dances symbolize peace, good luck and good harvest in the year ahead.
Proyecto Tómalo y Hazlo - Enero 5 ¡Celebre el Año Nuevo Chino! Materiales suministrados
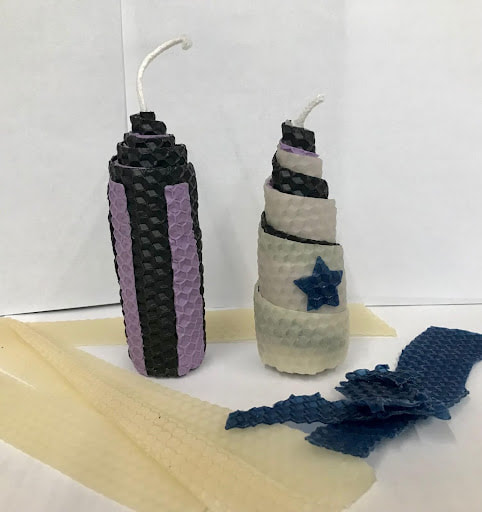
Create a candle using beeswax sheets and a wick. Use the colored sheets to make shapes or designs to add to your candle and make it unique! These are fun and creative gifts to give for the holidays!
Instructions
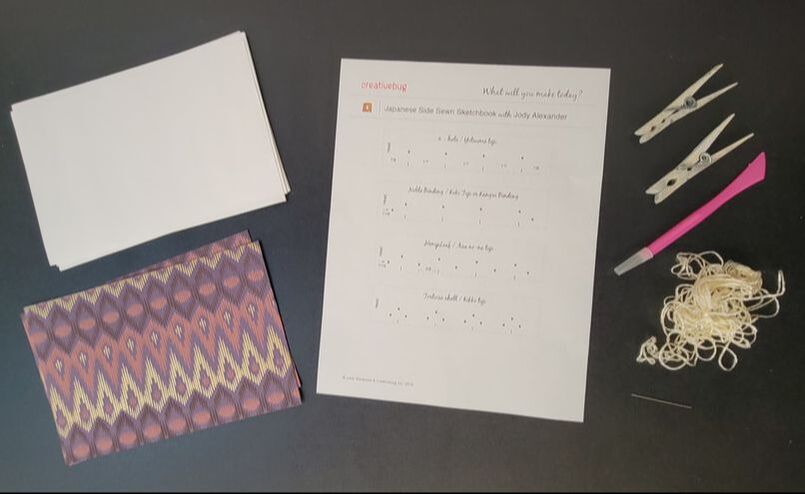
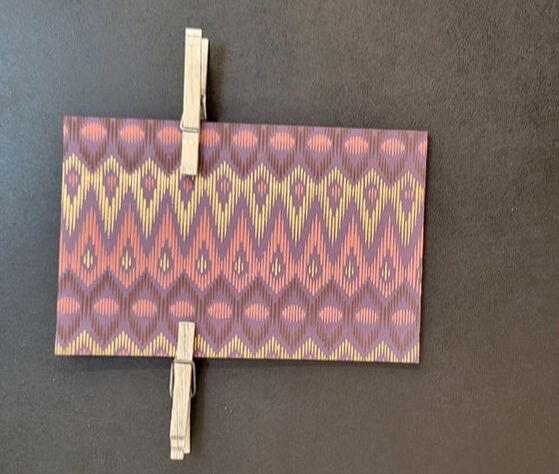 2. Cut out the 4-/hole/ Yotsume toji bookbinding pattern. Use the awl to poke holes through the dots on the pattern. 3. Place your bookbinding pattern on top of your front cover, lining up the edge of your template with the edge of your cover. Using a cutting matt, poke holes as indicated on the pattern through all your layers of paper. Making this project with younger kids? Use a hole punch to create holes for the binding instead of the awl - just stick to the pattern! 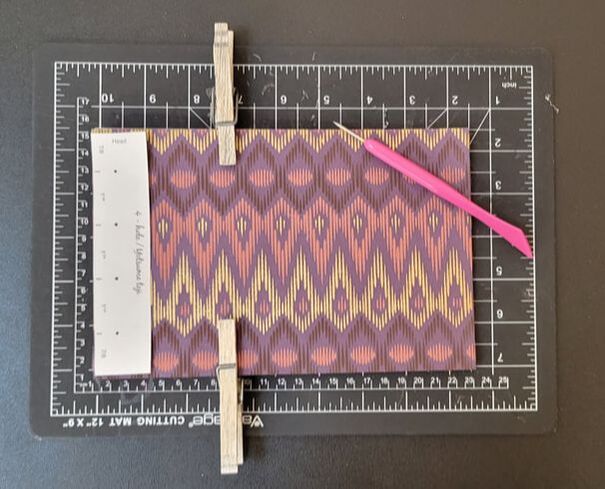 4. Thread your needle with the provided string. Thread your string through the third hole from the top, leaving a 3” tail between the pages. Heading towards the top of the book, weave your needle and thread through each hole. Remember to go around the side edge of the book, and around the top and bottom edges as well, while having threaded between each adjacent hole, front and back. We recommend watching the video tutorials to see how this works - it’s not as hard as it sounds! You can skip ahead to this section by clicking “Binding” in the chapters section. 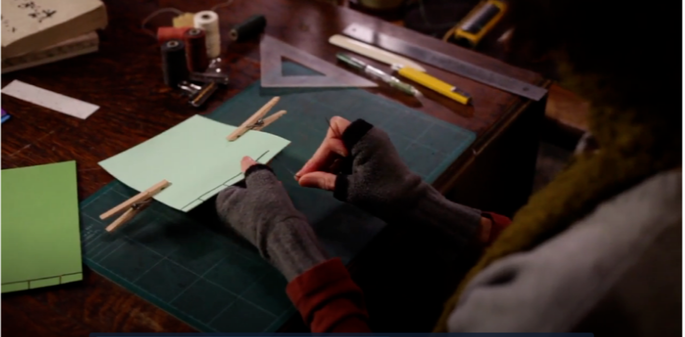 5. If bound correctly, your thread will end near the tail we started with. Tie this together with a small amount of slack and trim the ends to about half an inch. Tuck the small tail ends deeper into the binding, and your Japanese Side-Sewn Book is ready for sketching or writing!  Encuadernación Japonesa con cosido a los lados
Proyecto de Arte para llevar a casa Niños y Adolescente ¡Crea tu propio cuaderno de bocetos o tu diario con una encuadernación japonesa con cosido a los lados! Las instrucciones paso a paso se encuentran a continuación, pero le recomendamos iniciar sesión en CreativeBug usando el número de su tarjeta de la biblioteca, donde encontrará tutoriales cómo: Japanese Side Sewn Sketchbook Kids Japanese Side Sewn Book ¡Estos videos serán especialmente útiles cuando se trata de enhebrar su encuadernación! Materiales incluidos en su kit 10 hojas de papel en blanco, 8.5 x 5.5 ” 2 hojas de papel de portada, 8.5 x 5.5 ” 2 ganchos de ropa Hilo de bordado Aguja para bordar Punzón Materiales de casa Tijeras Cualquier superficie que sirva como base para cortar (sufrirá cortes en su superficie) Opcional: perforadora Patrón de encuadernación para los agujeros. Instrucciones 1. Apile las hojas de papel en blanco y coloque los dos papeles de portada al comienzo y al final. Una vez que tenga todo alineado y luciendo ordenado, use los ganchos para ropa para mantener todo en su lugar. 2. Recorte el patrón de encuadernación de 4 agujeros / Yotsume toji. Utilice el punzón para hacer agujeros a través de los puntos en el patrón. 3. Coloque su patrón de encuadernación en la parte superior de su portada, alineando el borde de su plantilla con el borde de su portada. Utilice la superficie que sirva como base para cortar y haga agujeros como se indica en el patrón a través de todas las capas de papel. ¿Estás haciendo este proyecto con niños más pequeños? Use una perforadora para crear agujeros para la unión en lugar del punzón, ¡solo manténgase en el patrón! 4. Enhebre su aguja con el hilo provisto. Pase su hilo a través del tercer agujero desde la parte superior, dejando una cola de 3 ”entre las páginas. Dirigiéndose hacia la parte superior del libro, entreteje la aguja y el hilo a través de cada agujero. Recuerde rodear el borde lateral del libro y también los bordes superior e inferior, mientras ha pasado entre cada orificio adyacente, por delante y por detrás. Recomendamos ver los tutoriales en vídeo para ver cómo funciona. Puede pasar a esta sección haciendo clic en "Encuadernación" en la sección de capítulos. 5. Si se encuaderna correctamente, su hilo terminará cerca de la cola con la que comenzamos. Ate esto junto con una pequeña cantidad de holgura y recorte los extremos a aproximadamente media pulgada. Introduzca los extremos pequeños dentro del encuadernado, ¡y tu libro japonés cosido a los lados estará listo para dibujar o escribir!  The Basalt Regional Library is pleased to announce it is a recipient of the Round Two Communities for Immunity grant, awarded to 50 museums, libraries, and tribal organizations serving urban, suburban, and rural populations across 33 states.
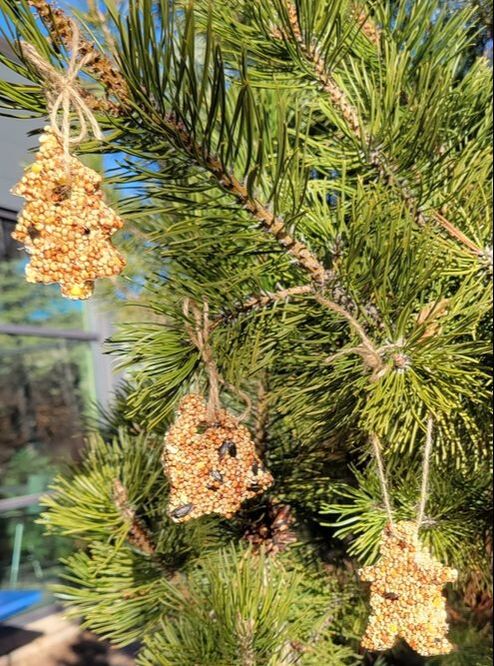
Supported by the Centers for Disease Control and Prevention (CDC) and the Institute of Museum and Library Services (IMLS), Communities for Immunity provides funding awards and support to museums and libraries engaging their communities to boost COVID-19 vaccine confidence. As trusted community partners, museums and libraries play a critical role in building vaccine confidence and fighting the pandemic. The Basalt Regional Library will host public programs with local and regional medical professionals and scientists in conversations regarding the history of vaccines in the 20th century and their social and cultural impacts. The Library is also collaborating with the graphic novelist R Alan, creator of the Colorado Sun’s weekly strip “What I’d Miss”, to create a graphic essay on the importance of the current vaccine campaign. These programs will supplement the Library’s on-going vaccine clinics as part of Governor Polis’ “Vaccines for All” plan. “Through this unprecedented partnership, Communities for Immunity is providing nearly 100 museums, libraries, and tribal organizations across the country with over $1.6 million over two rounds of funding to help their community members make well-informed decisions about COVID-19 and vaccinations,” said Laura Lott, President and CEO of the American Alliance of Museums. “These organizations are linchpins in helping bring an end to the pandemic and leading their communities into a brighter, healthier future.” Click here to learn more about Communities for Immunity. Create fun and festive bird-feeder holiday ornaments with this week’s grab & go activity! Made with bird seed, gelatin, and hemp twine, these cute decorations can be put up outside to feed our feathered friends at a time when food sources for birds can be scarce.
The recipe below and ingredients included in your kit is enough to make 5-10 bird-seed ornaments. If you have cookie cutters at home you can use them to make the whole batch at once. If you are only making one ornament at a time, we recommend cutting the recipe in half. *If you are making this activity with materials from home, please use twine made of 100% natural fibers (cotton, hemp, wool, etc.) that will biodegrade overtime if left outside. Please also make sure your gelatin is unflavored and contains no sugar. Artificial flavoring and sugar can be harmful to our native bird species.
Adornos para comederos de pájaros Proyecto de Arte para llevar a casa
Los materiales incluidos en su kit son suficientes para hacer de 5 a 10 adornos para comederos de pájaros. Si tiene cortadores de galletas en casa, puede usarlos para hacer todo el lote de una vez. Si solo está haciendo un adorno a la vez, le recomendamos que reduzca la receta a la mitad.
*Si está realizando esta actividad con materiales de su casa, utilice un hilo/cordel 100% natural (algodón, cáñamo, lana, etc.) que se biodegradarán con el paso del tiempo si se dejan afuera. También asegúrese de que su gelatina no tenga sabor y no contenga azúcar. Los aromatizantes artificiales y el azúcar pueden ser perjudiciales para nuestras especies de aves nativas.
Experiment with popsicle sticks, plastic spoons, and rubber bands to create your own catapult! 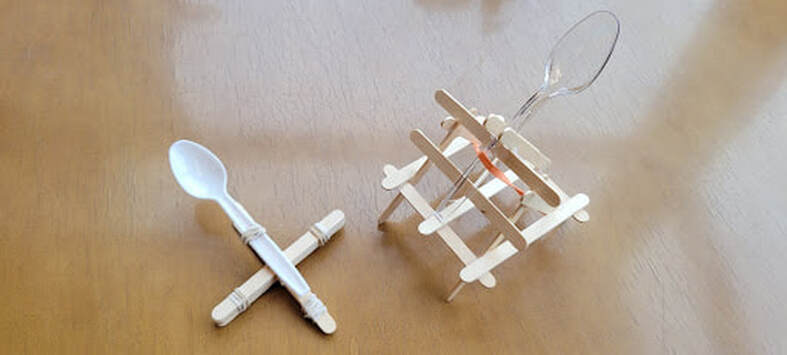
A catapult is a lever device designed to launch projectiles without the aid of propellants or fuel. Most catapults use tension energy that is gradually stored, and then released all at once to launch the projectile. A good example of this is a slingshot, which is actually a simple catapult! As the band of the slingshot is pulled back, the band is loaded with tension energy - the further you pull back, the more energy is stored in the band. When you let go, the band releases that energy all at once, snapping back into place and flinging your object away. In ancient times catapults were used in siege warfare, but are mainly used now for launching airplanes from aircraft carriers! To build a simple popsicle stick catapult, watch this video from Youtube STEM and craft creator Denise Bertacchi. To get ideas for a more complex design, check out this Accurate Catapult with Popsicle Sticks video from high school physics teacher and creator Raymond Burns. Once you understand the basics, experiment to create your own catapult design! What happens if you move the fulcrum - the supporting popsicle sticks underneath your plastic spoons? When you bend the spoon back you are applying force to the catapult. The fulcrum is transferring the force from bending back the spoon to shooting your ammo. What happens when the fulcrum is closer to the spoon head? What happens when the fulcrum is farther from the spoon head? To learn more about the history of catapults, check out this article from Britannica Library Young Adult. To learn about simple machines and the physics behind them, learn more at Britannica Library Children. To translate these pages into Spanish, click on the globe icon and select “Spanish” from the drop down menu. Projecto de Arte para llevar a casa: Catapultas de palitos de helado¡Experimente con palitos de helado, cucharas de plástico y gomas elásticas para crear su propia catapulta!
Una catapulta es un dispositivo de palanca diseñado para lanzar proyectiles sin la ayuda de propulsores o combustible. La mayoría de las catapultas usan energía de tensión que se almacena gradualmente y luego se libera de una vez para lanzar el proyectil. Un buen ejemplo de esto es una honda, que en realidad es una simple catapulta. A medida que la banda de la honda se tira hacia atrás, la banda se carga con energía de tensión: cuanto más se tira hacia atrás, más energía se almacena en la banda. Cuando lo sueltas, la banda libera esa energía de una vez, volviendo a su lugar y arrojando tu objeto. En la antigüedad, las catapultas se usaban en la guerra de asedio, ¡pero ahora se usan principalmente para lanzar aviones desde portaaviones!
Para construir una catapulta de palitos de helado simple, mira este video de Youtube STEM de la creadora de manualidades Denise Bertacchi. Para obtener ideas para un diseño más complejo, vea este video de Catapulta precisa con palitos de helado del maestro de física y creador de la escuela secundaria Raymond Burns. Una vez que comprenda los conceptos básicos, ¡experimente para crear su propio diseño de catapulta! ¿Qué sucede si mueves el fulcro (punto de apoyo), los palitos de paleta de soporte debajo de tus cucharas de plástico? Cuando dobla la cuchara hacia atrás, está aplicando fuerza a la catapulta. El fulcro transfiere la fuerza de doblar la cuchara hacia atrás para disparar la munición. ¿Qué sucede cuando el fulcro está más cerca de la cabeza de la cuchara? ¿Qué sucede cuando el fulcro está más lejos de la cabeza de la cuchara? Para obtener más información sobre la historia de las catapultas, consulte este artículo de Britannica Library Young Adult. Para aprender sobre máquinas simples y la física detrás de ellas, aprenda más en Britannica Library Children. Para traducir estas páginas al español, haga clic en el icono del globo terráqueo y seleccione "Español" en el menú desplegable. 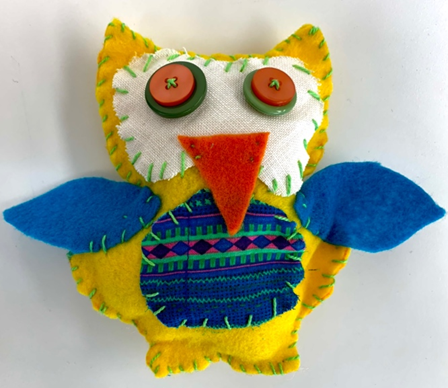
Take pictures and email to info@theartbase.org or Kristen Doyle, kdoyle@basaltlibrary.org. Cose un búho de peluche
|
Adult News & reviewsLibrary news, info about upcoming events, reviews of books and films, and a look at the topics that affect us as a library. Archives
July 2023
|


 RSS Feed

|
General |
Borrowing |
About |