
|
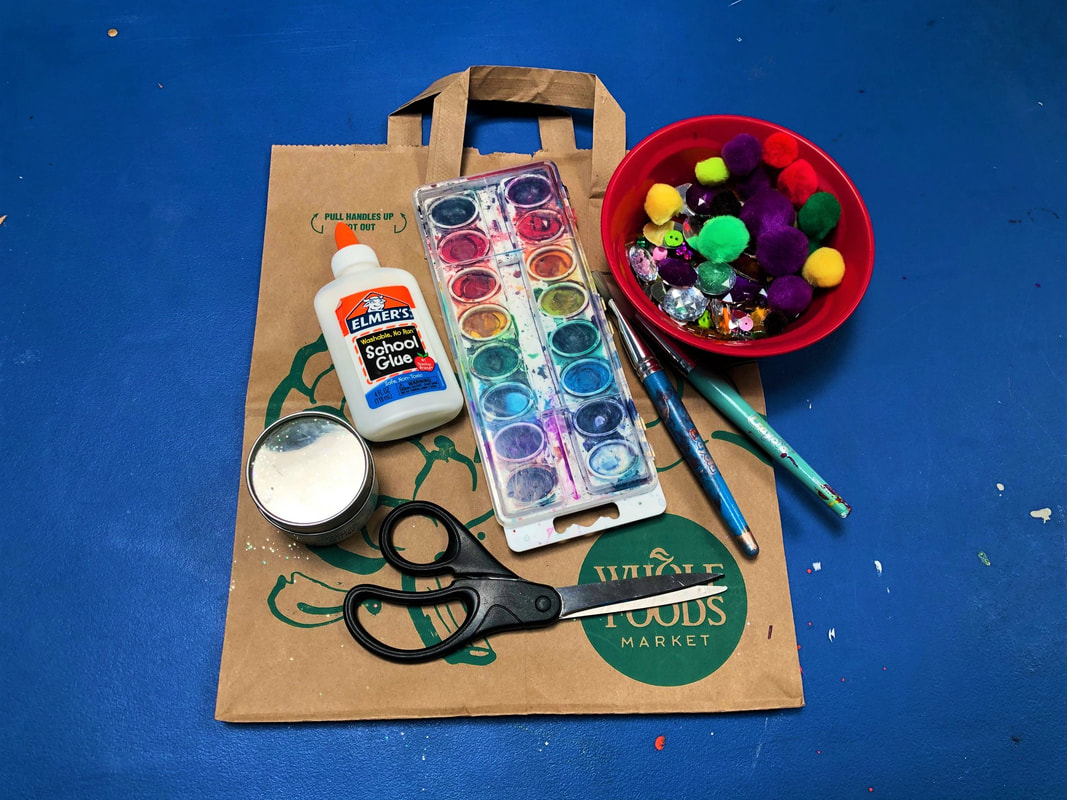
Brighten your day and jazz up your outfit with a dazzling crown! 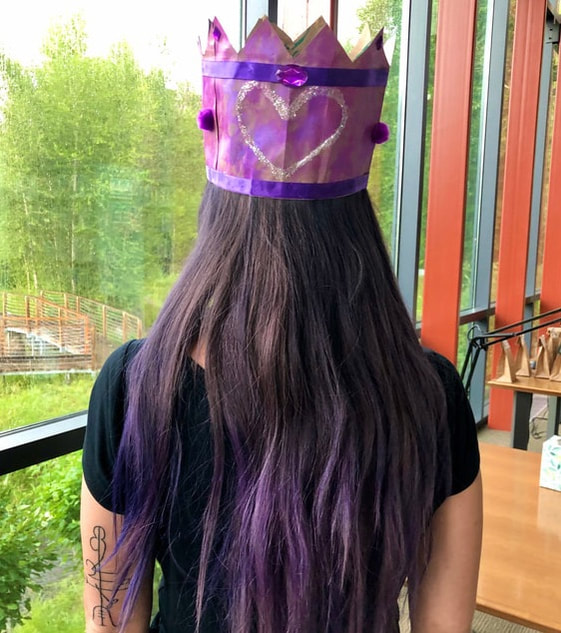 This craft is adapted from Art Bar Blog, which you can read at www.artbarblog.com/paperbag-crowns. Materials:
Instructions: Step One:  Cut your paper bag down one side and then cut off the bottom of the bag. Next, trim down the bag to fit your child’s head. To do this, wrap the bag around your child’s head and add an inch to the end, then cut off the excess bag. Step Two: 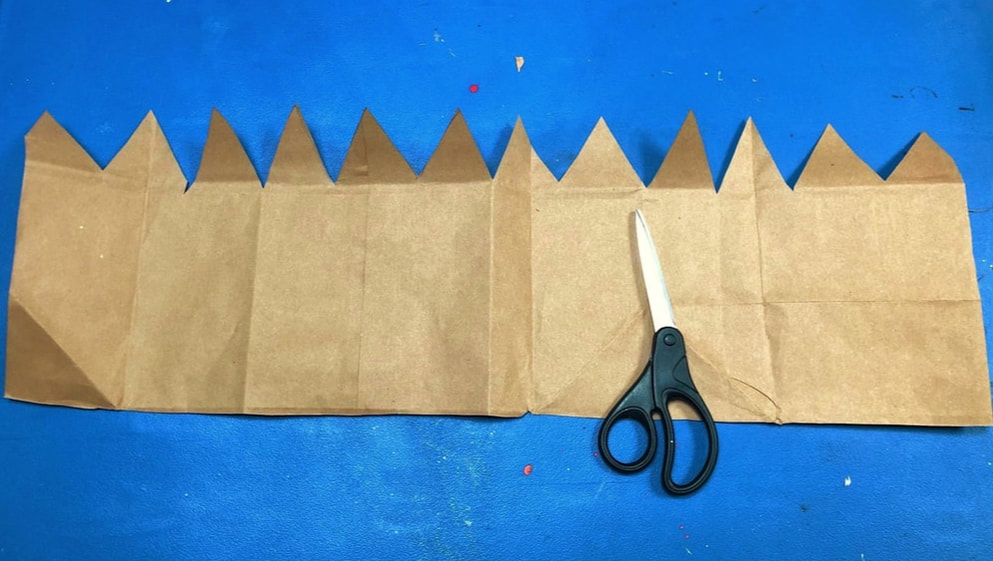 Lay the bag flat and zigzag cut across the top. Step Three: 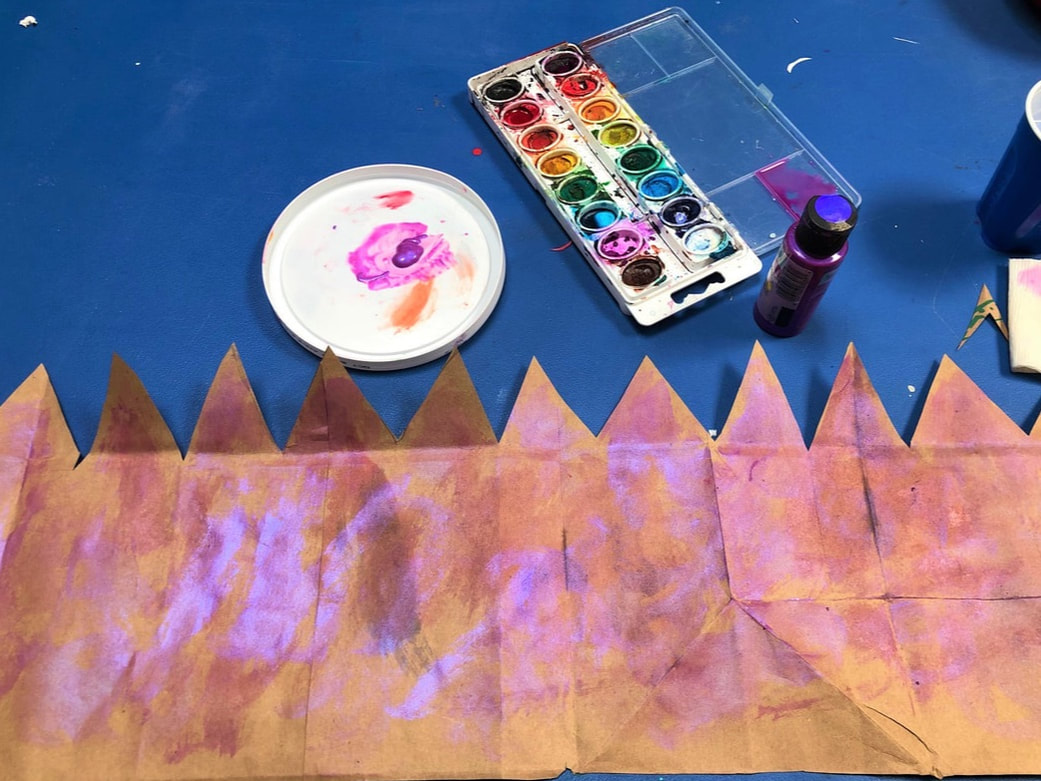 Now comes the fun part—decorating! Paint the background of your crown with watercolor or acrylic paint and then let the paint dry completely (you can use a hairdryer to speed up this process). After the paint is dry, you can add more detailed designs with markers, crayons, pencils, or more paint. Let any additional layers of paint dry completely before moving on to the next step. Step Four: 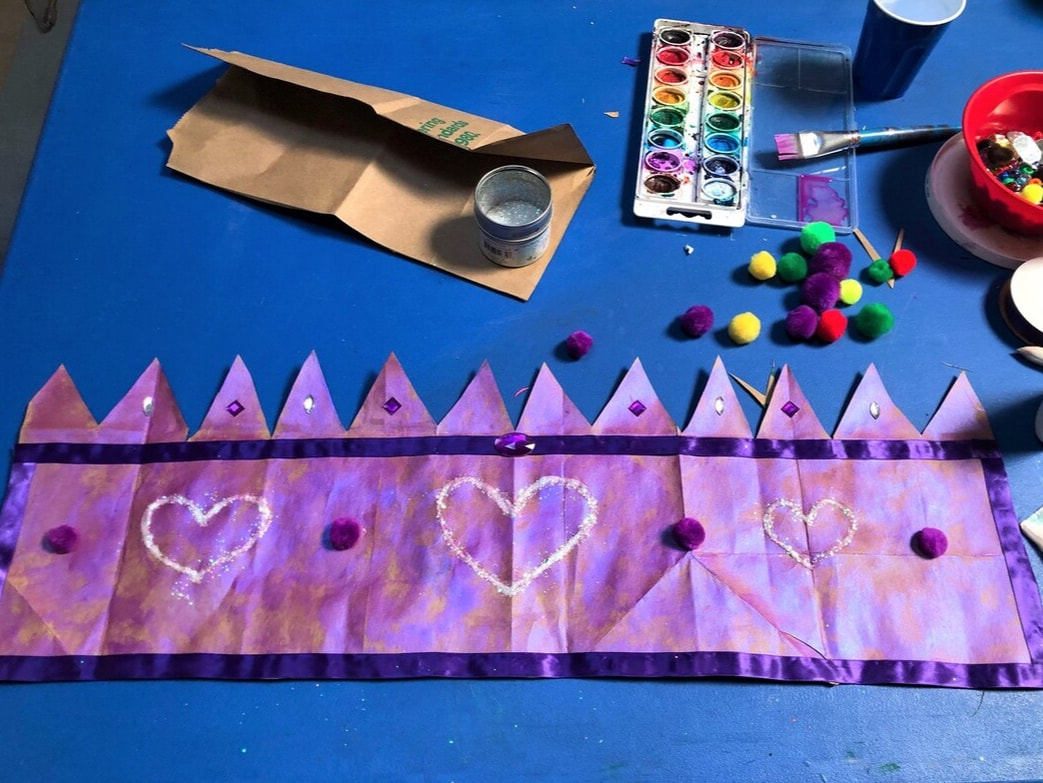 Embellish! Add a bit of sparkle and dimension by gluing on jewels, pompoms, glitter, ribbons, etc. Once you are satisfied, let the glue dry completely. Finally, wrap the crown around your child's head and use tape to connect the ends of the crown. Now your gorgeous royal accessory is complete! Looking for more fun creative activities this summer? Use your Basalt Library card to access arts and crafts classes from CreativeBug!
0 Comments
Your comment will be posted after it is approved.
Leave a Reply. |
Adult News & reviewsLibrary news, info about upcoming events, reviews of books and films, and a look at the topics that affect us as a library. Archives
July 2023
|
 RSS Feed

|
General |
Borrowing |
About |